
Managing Invoices with miniInvoices
miniInvoices is a part of the Writer’s Tools package for OpenOffice.org tailored to professional writers created by yours truly. So if you write for a living, you can use miniInvoices to generate and manage invoices without leaving the convenience of your favorite productivity suite. Although miniInvoices is not the most advanced invoicing application out there, it includes a few nifty features such as the ability to manage multiple currencies and generate reports. And since miniInvoices is not overloaded with all kinds of advanced features, it’s rather straightforward in use. Better yet, since miniInvoices is a database application developed with OpenOffice.org Base, you can easily tweak it to fit your particular needs.
 To get started with miniInvoices, download the latest version of the application from the project’s Web site. miniInvoices’ reporting capabilities rely on the Sun Report Builder extension, so you have to install it first. To do this, download the extension, launch OpenOffice.org, and choose Tools -> Extension Manager. Press the Add button, select the downloaded .oxt package, and press OK to install the extension. Next, install the miniInvoices.oxt extension bundled with the miniInvoices package. This extension allows you to access miniInvoices’ features via a dedicated menu in OpenOffice.org’s main toolbar. Once the extensions are installed, restart OpenOffice.org. Finally, you have to register the miniInvoices database in OpenOffice.org. To do this, choose Tools -> Options -> OpenOffice.org Base -> Databases. Press New, and use the Browse button to select the miniInvoices.odb file. Make sure that the Registered name is set to “miniInvoices”, and press OK to save the settings and close the dialog window.
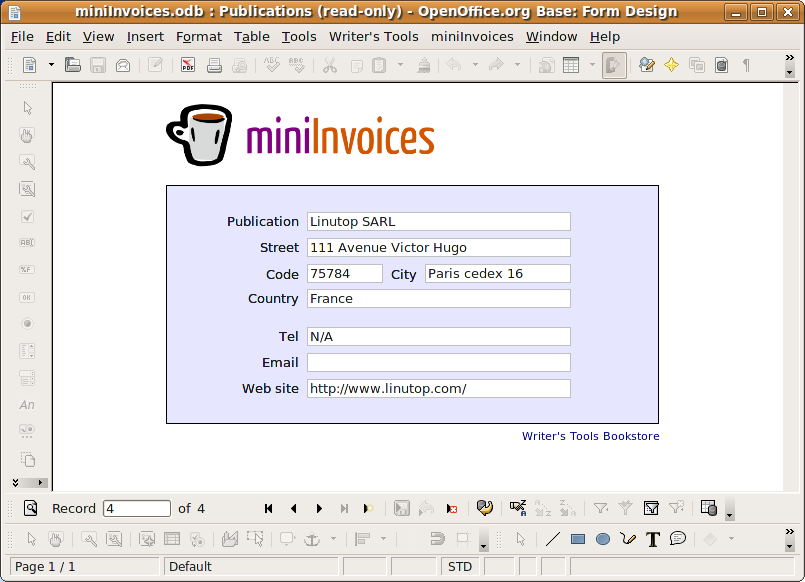
The first thing you have to do is to populate miniInvoices with the publications (or customers) you work for. In OpenOffice.org, choose Open Publications from the miniInvoices menu. Press the New Record button in the Form Navigation toolbar (if you don’t see the toolbar, you can enable it by choosing View -> Toolbars -> Form Navigation). All the fields in the form are self-explanatory, so you shouldn’t have problems filling them out. Press the Save Record button.
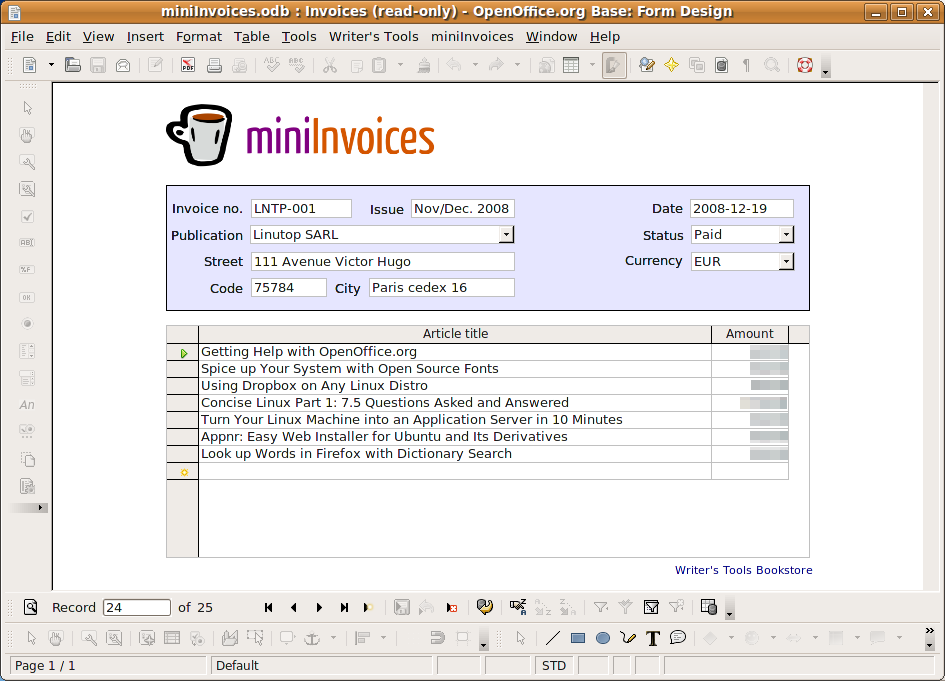
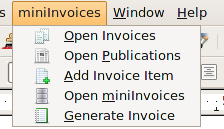
Once you’ve added the publications, you can start creating invoices. Choose Open Invoices from the miniInvoices menu and create a new invoice by pressing the New Record button. Enter an invoice number in the Invoice no field and an issue number in the Issue field. The latter value is mandatory, and it must be unique. Normally, you’d enter the issue number of the publication where your articles are published. However, if you’re creating an invoice for articles published on a Web site or other types of writings like product sheets or press releases, you can enter a date or another unique identifier, for example, “PR Dec. 20008″ or “Blog post 2008-11-01″. Next, enter the publication’s name in the Publication drop-down list exactly as it appears in the Publications table and press the Save Record button. This will automatically insert the publication’s address information in the appropriate fields. You have to enter the name of the publication only once: after that, it automatically appears as an item in the drop-down list. Fill out the rest of the fields and enter each article and its price in the Articles table. Using the Add Invoice Item command in the miniInvoices menu, you can quickly add articles to an existing invoice without switching to the miniInvoices database. To do this, choose the Add Invoice Item command, fill out the required fields, and press the Add button. To create a print-ready invoice, choose the Generate Invoice command from the miniInvoices menu. When prompted, enter the number of the invoice you want to print, and press OK. This creates an invoice, and you can either print it by choosing File -> Print, or export it as a PDF document using the File -> Export as PDF command. miniInvoices can also help you to view your invoicing data by generating three types of reports: Earnings by Month, Earnings by Publication, and Earnings by Year. To generate a report, choose the miniInvoices command from the miniInvoices menu. In the opened miniInvoices database, switch to the Reports section, and double-click on the report you want.


January 11th, 2009 at 7:39 am
[...] Read more at Linutop [...]